Although rendering is used on property because of its durability and stylish appearance, it is able to sustain damage if it is subjected to sudden and great changes within the property structure e.g. if the house foundation sinks unevenly to the ground due to a faulty ground foundation.
Any cracks noticed regardless of how small they are have to be immediately repaired as the small cracks will let in small amounts of water that slowly erode the inner structure of the render due to the effect that changes in temperature have on the water i.e cold temperatures cause water to form ice and expand, slowly breaking the internal structure. Eventually, big cracks form.
First step in dealing with this problem is to fill in the large cracks and gaps with the same rendering material which the damaged structure is made of. However if you are not able to use the same rendering material, a rendering patching compound should be used to fill up the gaps.
In the case of small cracks, they can be filled with all-acrylic or siliconized-acrylic sealants. In the case of large cracks, the task will be more complicated to complete so people often find they don’t have enough time to repair such a large crack so instead it is best to use a silicone caulk sealant to form a water proof seal over the crack temporarily until one has sufficient time and materials to undertake such a repair. When one has enough materials and time to fix a large crack, the silicone caulk sealant is simply removed.
![]()
When it comes to repainting the cracks in the same colour as the rest of the rendered surface, simplicity is key. Once repairs to the rendered surface have been made, the whole of the rendered surface should be painted with a cement-based paint or an acrylic exterior paint. Note: Any repairs made to the cracked rendered surface should be allowed to dry for at least 30 days prior to repainting the whole of the rendered surface with a single cement-based or acrylic exterior paint. Before applying the paint to the newly repaired rendered surface, the surface should be damped. Also note that prior to applying cement-based paint, a primer coat is required to be applied to the rendered surface first to allow the cement based render to be applied evenly and avoid forming blotches. However, in the case of acrylic paint being used, a primer coat is not required.
The tools required for carrying out the repair of a cracked rendered surface are:
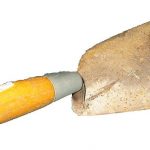
a cold chisel, a short-handled sledgehammer, a premixed render/ render patching compound, a hawk, a Mason’s trowel and a straight-edged board.


Other equipment which may be required are: a ladder, metal shears, steel mesh, galvanised nails and a finishing tool.
There are four steps involved in repairing damaged external renders, these teps being:
1) Removing the damaged render
All the weakly held and worn out render are slowly chipped away. Note: googles and gloves must be worn at this stage to avoid eye injuries.
2) Repair any steel mesh
Any existing mesh present in the damaged render is likely to be damaged as well and so to repair the damaged mesh, a new piece of mesh is cut out using metal shears and attaching it to the wall with the galvanised nails.
3) Filling the hole
Now that all of the prep work is done it is time to apply your new render. Mix more than enough render or render patching compound to fill the hole, trowel the render patching compound onto the mesh, pushing the render into the mesh. A hawk (plaster’s tool) is used to have a supply of newly mixed render close at hand after repairs have been made. Note: the patch should be thicker than the adjacent render.
4) Getting the right finish
Smooth out the patch surface by sliding a straight-edged board back and forth, achieving a level surface.
Try to make the newly repaired rendered surface blend into the rest of the surface by imitating the the texture of the surrounding render by passing over the wet surface with a “finishing tool” such as a trowel, a board or whatever is appropriate for the particular effect.